With a week to go it's going to be another close one but I'm confident this can be pulled off. Baring in mind I do still need to do the video to my remix, create an animated logo for D-Fusion and write both the essay and evaluation, looks like I'm going to have many a sleepless night over this next week.
Thursday, 21 May 2009
FMP - Development - Stay Focus Original
After sitting here for the past 11 hours I'm starting to feel a little worse for ware, however there is the prospect that I might have produced the final edit for the original Stay Focus track. This can not confirmed yet though as the directors have not seen it and we are still without the final scene due to cast being unavailable. Ok so it's not quite final but it's close enough to allow me to begin grading the scenes first thing tomorrow, in an attempt to help the transition from one scene to another more pleasing on the eye.
Wednesday, 20 May 2009
FMP - Development - Portable Hard Drive Size is Slowing me Down

I know have 1.5TB of storage on my home computer so running out of space shouldn't be a problem for a while. However my portable hard drive is beginning to cause problems in the production of both the Stay Focus music videos and the D-Fusion promo, these combined projects total in excess of 200GB (so I hope the tutors don't want all the development work on disc because they'll end up with about 40 DVD's).
The amount of raw footage we have takes majority of this memory, unfortunately this has resulted in me to keep changing the files on my hard when edited one or the other project. This is made more time consuming due to the fact that I can't just edit one project at a time, as these projects are for clients they need give feedback on my editing progress.
FMP - Development, Colour Range and Colour Spill
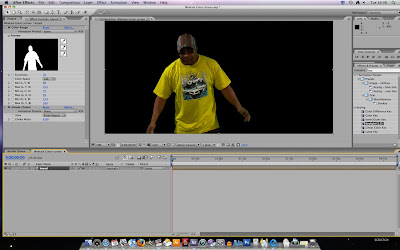
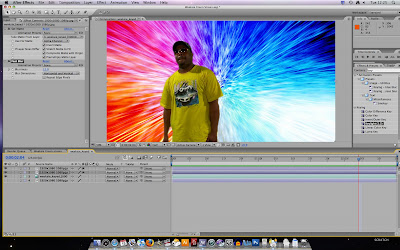 This technique is very useful means when extracting the background of your green screen footage. As you can see the subject is clearly not dressed appropriately for being film in front of green screen, although the yellow isn't quite as bad as the line of green he has on his t-shirt, Keylight (1.2) struggles to make a clear distinction between green and yellow. To add to the bad choice of colours for this kind of shoot comes the fact that this was filmed not on green screen but on a sheet of green paper the lighting wasn't great either, with light reflecting of some parts with clear shadows on others not, exactly ideal.
With time running out it would be difficult to shoot this again, by using colour range instead of Keylight, it is possible to remove only the shades of green needed. This gives a much more controlled process of extracting a background.
The process of colour spilling is useful for blending a new background in behind your subject. Unfortunately to do this you need to export your footage as a png sequence, remember to select the Alpha channel as well as the RGB, as this will be used sort of like a mask.
Next find a background you wish to use, I've got a colourful image from a google search for this example. Make a duplicate of the background and bring this to the top of the layered timeline, then apply set matte from the effects panel. Select the drop-done menu entitled, "Take matte from layer." setting this to your subject. Finally adding a fast blur helps soften the edges of the subject helping them blend with the background better.
I have uploaded a few seconds clip of this below so you can get an idea of how well it has worked given the circumstances. Their is still a bit of green on a few frames and a piece at the bottom right corner that is there throughout the clip, however this could easily be masked out or given further colour range usage, as a test this has done the job as it's convinced me there is no need to re shoot.
Monday, 18 May 2009
FMP - Development - Stay Focus Remix
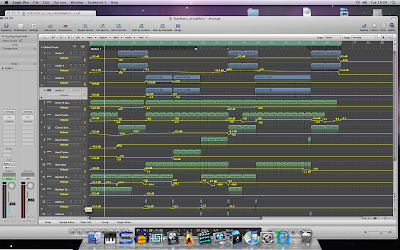
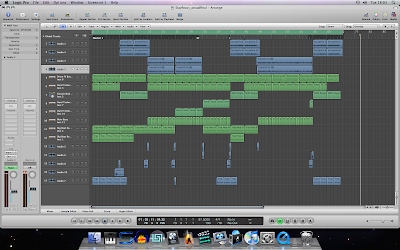
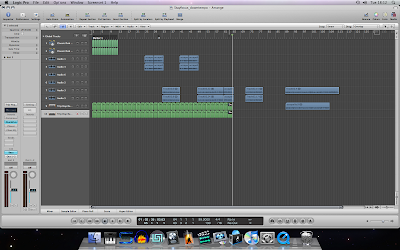
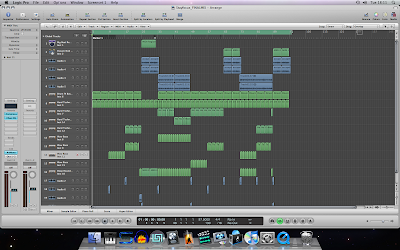 As stated in the FMP proposal, I planned to make a remix for the track that Kiran and I are producing the music video for. I have also suggested producing a music video for this, as there is plenty of unused footage the content is available to do this. The track I have produced here is similar to the other work Stay Focus have done, the genre is a cross between Grime and Downtempo, the bassline is most defiantly Grime but the tempo is far slower than normal. With a BPM count of 97.5 it was difficult to develop a track that would compliment the vocals. The main problem I encountered is the chorus coming in on the last beat of the previous 16 bars, sung in an offbeat style, this didn't work with anything I produced so I made this and changed the chorus to make it on beat. This made it difficult to work with Gareths rap because it meant I had to cut the last beat of his 32 bar vocal. By adding rewind effects I managed to get around this by making it sound like it was meant to be produced this way making it sound like it had been mixed on decks. I have already had a good few compliments on this track with a few people saying its better than the original, however that is only a matter of opinion governed by taste in music. The influence is taken from the dubstep and drum & bass I used to mix although a much slower tempo than I'm used to, I guess this is the reason I chose to use an excessive amount of beats in each bar.
Sorry about the screenshots, they don't really show how I have produced this track. I started how you would go about making a track which involves laying the beat down first, however the next step was a little controversial. As I had to fit lyrics to this I decided to make sure the worked with the beat first, I tried a number of different styles from dub to garage and motown to trip hop. In the end I came up with this, I think the only way it could be described is downtempo drum & bass, if you like. The bass had already been planned out in my head, I knew I wanted a eccentuated raspy bassline that over powers everything else in the track, this has become popular on dancefloors throughout Europe in the past few years. When I dropped this in it seemed to work a treat with the beat and Gareths lyrics, however for Faadil's lyrics I had to break the song down and use a low frequency bass otherwise it sounded shockingly bad. I use a range of samples and Apple loops for the jingly bits, the apple loops I use were midi meaning I could change the notes to fit the rest of the tune. Unforuately blogger won't let me upload this tune so I'm afraid you will have to wait until I have done the video for it.
Sunday, 17 May 2009
FMP - Development - Home setup not quite up to scratch
Ok so I've finally got a copy of final cut working at home, however the colleges version is newer so I'm unable to open any projects made at their. To be honest shouldn't complain at though I do now have a computer to work on at home with a similar spec than the ones we access to at college.
Unfortunately the same can not be said about my screens, I have a 19 inch 800x600 pixel screen and 32 inch HD Ready with possibly colour definition ever 4000:1, this coupled with the fact that the horizontal lines shake when in 1920x1080 mode makes my TFT Monitor generally rather crap for editing.
Tuesday, 12 May 2009
FMP - Reasearch - C.A.G - These Streets
studio shots because the continuity is lost when the video cuts to
the footage filmed in the infinity curve. We have figured that we are
going to replace some of this footage with shots of Gareth handing
out his CD on the streets, whilst the rest of footage will involve the
artists singing in different locations. I suggested getting a shot of
the Leeds skyline in the background. Fortunately Zaadil knows the
owner of the Leeds Media Centre in Chapeltown and was able to get
us access to the roof. It overlooks the old high rise buildings from
North East Leeds.I was shown this music video by Gareth because
this location has already been used in this video below however this
was filmed at night and ours won't be so we should manage to get
away with it. Now it's just a case of waiting for the weather to clear up.
Tuesday, 28 April 2009
FMP - Techniques and processes - De-interlace Footage
I was forwarded this post by Faadil after I expressed concerns about using interlaced footag, I wanted the video to have an authentic film look to it, he suggested the technique could be just what I need to achieve this.
Firstly when your shooting, try to get hold of a film lens adapter system which fits on the end of the camera. I use a Letus Extreme, which is cheap and does the job well, it allows you to put on Manual SLR lens' from old school cameras, so immediately you get a more anamorphic view, i think you can hire them for around 40 pounds a day - well worth it.
Once you've finished your film, the first thing you want to do before compressing and burning to dvd or export to the net is to de-interlace the image. So in Final cut;
1. put your in and out points on your timeline sequence using the 'i - o' keyboard shortcuts - this selects the bit of the clip you want to export.
2. once highlighted, go to 'file' - 'export' - 'quicktime movie' - give it a name, make sure the box entitled 'make movie self contained' is left un-ticked, give it a destination and click ok.
3. once your film has finished exporting, make a new sequence in final cut.
4. reimport the clip into the sequence, twice, make sure both clips are in sync.
5. delete one of the audio tracks from one of the clips you imported.
6. so you should be looking at two identical video clips, one on top of each other in video channel 1 and 2, while audio just fills audio track 1 and 2.
7. in the effects window click on the 'video filters' tab, then 'video' tab, then click and drag the 'de-interlace' effect onto both video clips.
8. double click the top clip and in the viewer window select 'filter' tab, make sure field dominance on the top clip is set to 'upper' (i think that should be default).
9. double click the bottom clip and in the viewer window select 'filter' tab, and set the field dominance to 'lower'.
10. highlight your film in the timeline sequence using the 'i - o' keyboard shortcuts and export anyway you like.
Now your clips are de-interlaced but will need rendering, depending on the project this may take some time.
Now i havnt mentioned colour correction. before you de-interlace i always drag on the 'colour corrector 3 - way' video filter onto each clip and fiddle around with the settings untill the blacks are really crushed, while increasing the yellow tint in the image - this is really essential to do, but down to personal taste so just practice with it.
The final stage is to use adobe after effects. There's constantly new 'film look' filters coming out on the market, most you can download for free but they require researching online, have you used the 'creative cow' forum? most of the filters are simply variations on 'de-interlacing' and 'flicker control'. I won't go into the nitty gritty of using after effects but try searching for the 'magic bullet' effect on google, this should open the door to other such 'after effects' film filters.
Subscribe to:
Comments (Atom)
